LinterGUI main screen
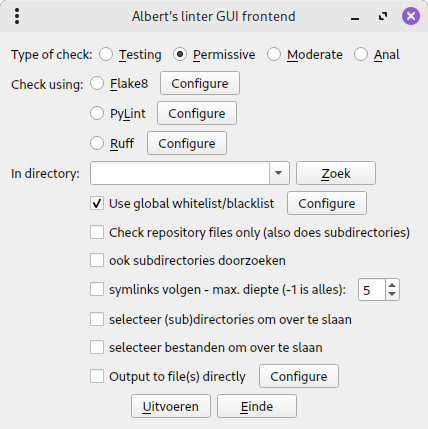
The first thing you need do in this screen is specify which linter to use. Currently you have the choices PyLint and Flake8. You have to install these yourself; if they're not installed, they can not be chosen. It's also possible to modify the per-user settings of the chosen linter from here.
Next, in the basic version, you have to specify the directory containing the files you want to inspect. There are also versions where you can start this app for just one file or for a selection of files and directories. You specify which version to use on the command line or in the shortcut you start it with.
When specifying a directory, in principle you scan all the files it contains. It is possible to do some filtering in this using a whitelist/blacklist, which you can also configure from here.
If the specified directory files is also a (Mercurial or Git) repository, you can have the tool scan only the tracked files. This choice respects the black/whitelist settings.
Like in FileFindR, you can specify you not only want to examine the files in this directory, but also those in subdirectories; and in case there are symlinks involved, you can choose to follow the links as well. You can also choose to further finetune the selection by manually selecting from the subdirectories and files that will be scanned.
Lastly you can choose to send the output directly to files. How this is done can be configured (one file or more; what names are used) directly from here.
All these options can also be specified on the command line; it's even possible not to have the initial screen and/or the results screen be shown at all.